Buffering during a critical client call? Frozen screens mid-presentation? Dropped connections costing deals? Issues streaming online business meetings remain a top frustration for Ohio companies- even in 2026, years after the pandemic normalized virtual collaboration. Zoom, Microsoft Teams, Google Meet, and other platforms power daily operations, but poor network performance turns “seamless” into stressful.
At Custom Cabling, we’ve helped countless Columbus-area and statewide businesses eliminate these streaming issues through structured cabling upgrades, Ethernet installations, and Wi-Fi optimizations. This guide covers the main causes of streaming issues in online business meetings, step-by-step fixes (including our cabling expertise), updated 2026 bandwidth requirements, and best practices to keep your virtual meetings reliable and professional.
Why Streaming Problems Happen in Business Video Calls
Streaming issues in online business meetings often stem from mismatched network capabilities vs. platform demands. Common culprits:
- Insufficient upload/download speeds (especially upload for sending your video).
- Unstable Wi-Fi vs. reliable wired connections.
- Background apps/devices hogging bandwidth.
- Outdated cabling/infrastructure is unable to handle modern demands.
- Human factors like Zoom fatigue or poor meeting hygiene are amplifying technical glitches.
These lead to lag, pixelation, audio dropouts, or full freezes- disrupting productivity and professionalism.
Top Technical Causes of Streaming Problems
- Bandwidth Shortfalls — Platforms auto-adjust, but low upload causes your video to degrade or freeze.
- Wi-Fi Instability — Interference, distance from router, or congestion creates packet loss.
- Network Congestion — Multiple devices/streams compete (e.g., downloads, smart office IoT).
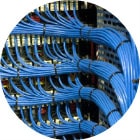
- Outdated Cabling — Cat5e or older limits speeds; modern Cat6A/Cat8 supports gigabit+ reliably.
- Device/Software Issues — High CPU from background tasks or unoptimized settings.
Human & Productivity Challenges in Virtual Meetings
Beyond tech, issues streaming online business meetings compound with:
- Zoom Fatigue — Constant video strains focus; over-scheduling worsens it.
- Communication Gaps — Missing non-verbal cues leads to misunderstandings.
- Time Zone/Availability Conflicts — Multi-location teams struggle.
Fixes blend tech (stable streams) with process (agendas, async tools).
Step-by-Step Fixes for Streaming Issues
Follow these to resolve most issues streaming online business meetings:
- Check & Optimize Your Bandwidth Test upload/download via speedtest.net or Google. Compare to the 2026 platform needs (see table below). Upgrade ISP plan if needed.
- Switch to Wired Ethernet Wi-Fi fluctuates; Ethernet delivers consistent low-latency. Install Cat6A cabling for future-proofing gigabit speeds. Learn about our Ethernet installation services.
- Limit Background Usage & Prioritize Traffic: Close tabs/apps, pause downloads, disconnect idle devices. Use router QoS to prioritize video calls.
- Adjust Platform Settings: Lower resolution (720p instead of 1080p), disable HD, turn off non-essential features.
- Upgrade Network Infrastructure: For persistent issues, professional cabling/Wi-Fi audits fix root causes like poor wiring or coverage gaps. Explore our Wi-Fi solutions.
Table: 2026 Bandwidth Requirements for Popular Platforms (Per User, Approximate)
| Platform | Activity | Download (Mbps) | Upload (Mbps) | Notes/Source |
| Zoom | 1:1 High-Quality Video | 0.6-1.0 | 0.6-1.0 | Zoom Support |
| Zoom | 720p HD Group | 1.2-2.6 | 1.2-1.8 | Zoom Support |
| Zoom | 1080p HD | 3.0-3.8 | 3.0-3.8 | Zoom Support |
| Microsoft Teams | HD Video (1:1/Group) | 1.2-4.0 | 1.5-4.0 | Microsoft Docs |
| Google Meet | HD Video (Group) | 2.6-4.0 | 1.0-3.2 | Google Support |
| General Rec. | Stable Business Calls | 20+ | 5-10 | For multi-user + sharing |
Best Practices & Tools for Ohio Businesses
- Batch meetings and use async tools (e.g., shared docs) to reduce frequency.
- Create agendas, mute when not speaking, and share screens for clarity.
- For Ohio offices: Invest in structured cabling for smart-building and IoT integration.
FAQ: Streaming Issues in Virtual Meetings
What upload speed fixes streaming issues in online meetings?
At least 5–10 Mbps for HD group calls.
Why does my business video call buffer on Wi-Fi?
Interference/congestion—switch to Ethernet.
How to fix lag in Teams or Google Meet?
Check bandwidth, lower resolution, and close apps.
Can cabling upgrades solve streaming problems?
Yes, structured Cat6A ensures stable gigabit performance.
What bandwidth do I need for 1080p in Zoom 2026?
~3.8 Mbps up/down per user.
Columbus Businesses Trust Us for Wi-Fi Solutions
With decades of experience in Wi-Fi solutions, we specialize in designing, installing, and optimizing wireless networks that deliver speed, security, and reliability- whether for a small office, large warehouse, or multi-location enterprise.